
How to make beautiful, customized mailboxes for your kids’ bedrooms

A clever way to pass notes, leave treats, or distribute chore lists to your kids

The idea of little mailboxes outside of children's rooms is nothing new. It's a charming, whimsical way to deliver just about anything to your little loved ones — a sweet note, a small toy, or even a list of chores they've yet to do. When they get a little older, you can drop forgotten, discarded things they've left around the house, such as earbuds or homework. Mailboxes for kids are a pretty great little system.

The problem with many kids' mailboxes we've seen on the market is that they're just — simply put — ugly. Cheap plastic, primary-colored, horrible little things. So we had the idea to make them ourselves. Ones that serve not only as delivery vessels, but also look charming in the hallway as well.

We turned to Amazon and found these great little boxes. They are just the right size, come with preinstalled hooks for easy hanging, and are sturdy enough to withstand the doors of toddlers and teenagers alike. Read on for an easy tutorial on how to make your kids customized mailboxes that will be purposeful and lovely in your home.
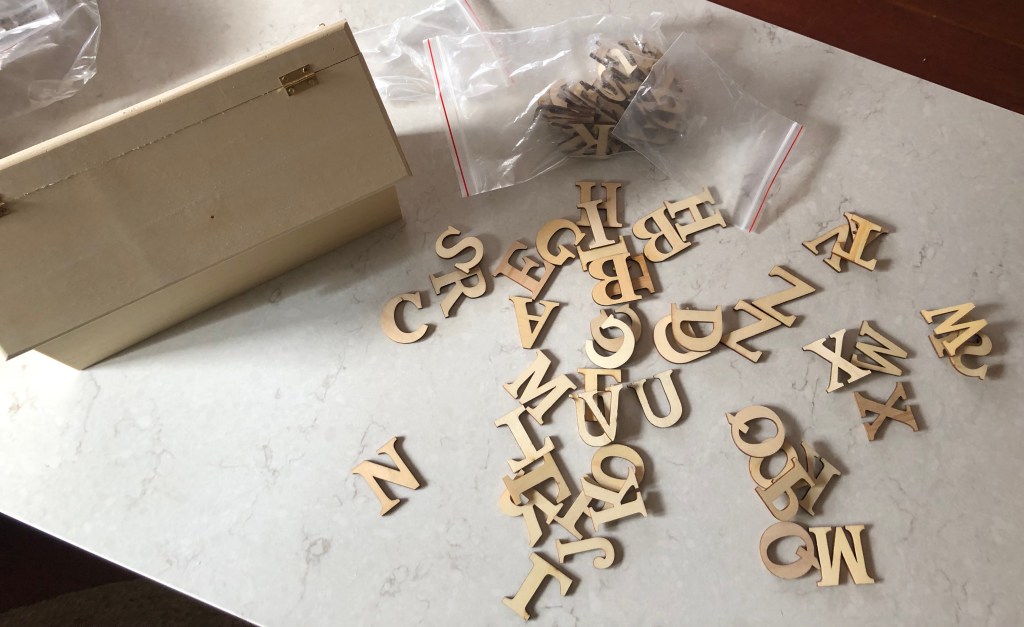
Difficulty

Easy

Duration

1 hour

What You Need

  • Mailbox

  • Letters

  • Spray paint (two colors)

  • Sandpaper

  • Wood stain

  • Wood glue, glue gun, or another strong adhesive

  • Old rag (that you feel OK about ruining)

Letters on a white paper
Lindsay Parrill/NewFolks

Get organized

Step 1: Sort through your letters and find the ones you’ll need.

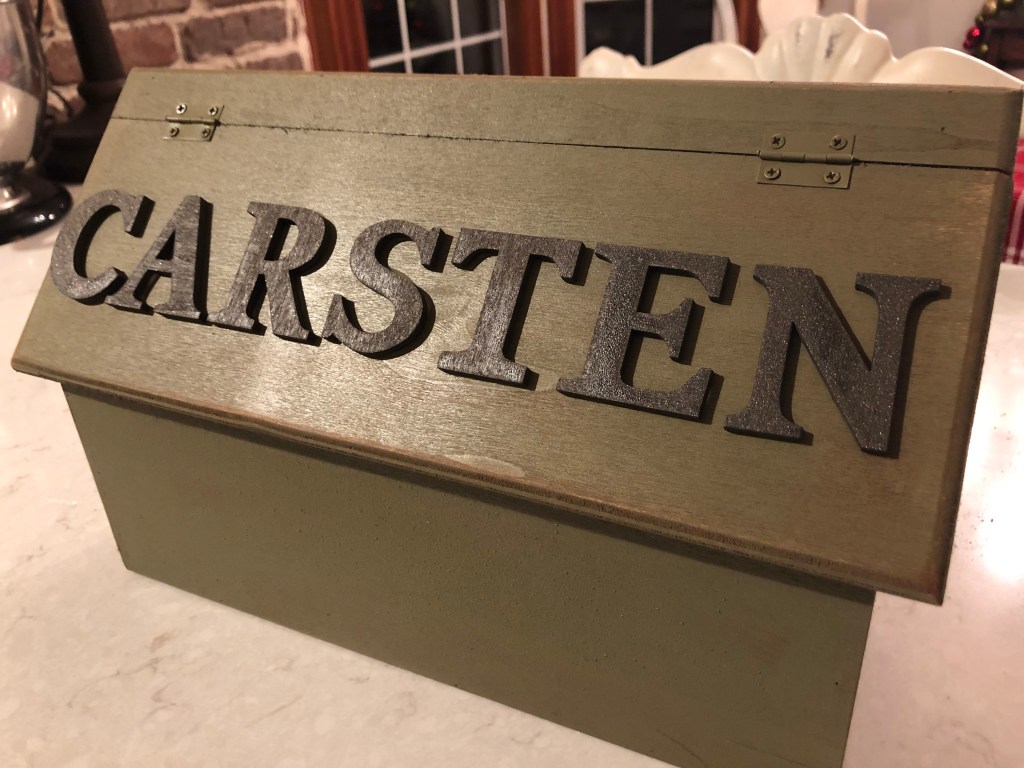
Step 2: Before you get to painting or gluing, check to be sure your letters will fit where you want to put them. The name we used, Carsten, at seven letters, seems to be the limit.

Step 3: If you have a longer name, you’ll want to use smaller letters.

"Carsten" on metal
Lindsay Parrill/NewFolks

Paint

Step 1: Find a good place to paint, and get to it!

Step 2: Paint both the outside and inside of the mailbox for a nicer, more professional look,

Step 3: Find something to hold the lid open while painting to make this step a little easier.

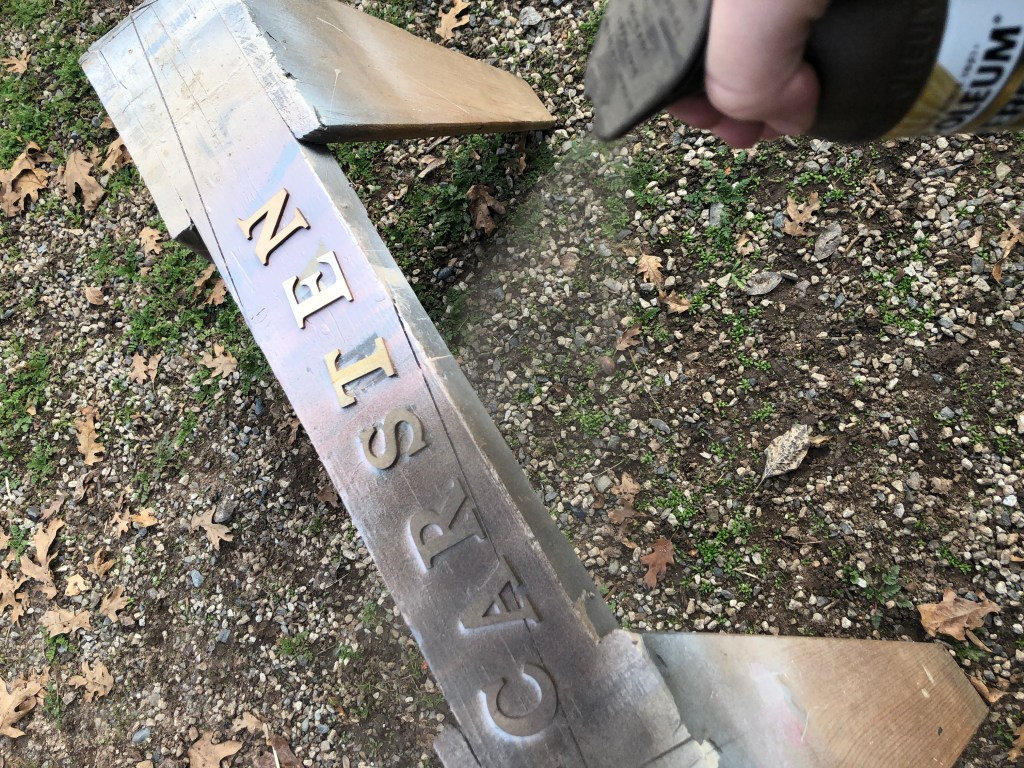
For the letters in Carsten’s name, we went with metallic spray paint for the letters, as it has a very cool contrast next to the paint of the mailbox. For the box itself, we used an army green with a satin finish, but this is totally customizable to your preference.

Sand (optional)

Once your paint is dry, you can sand the edges slightly for a more antiqued look. This step is totally optional, but we love the character it brings to the finished product.
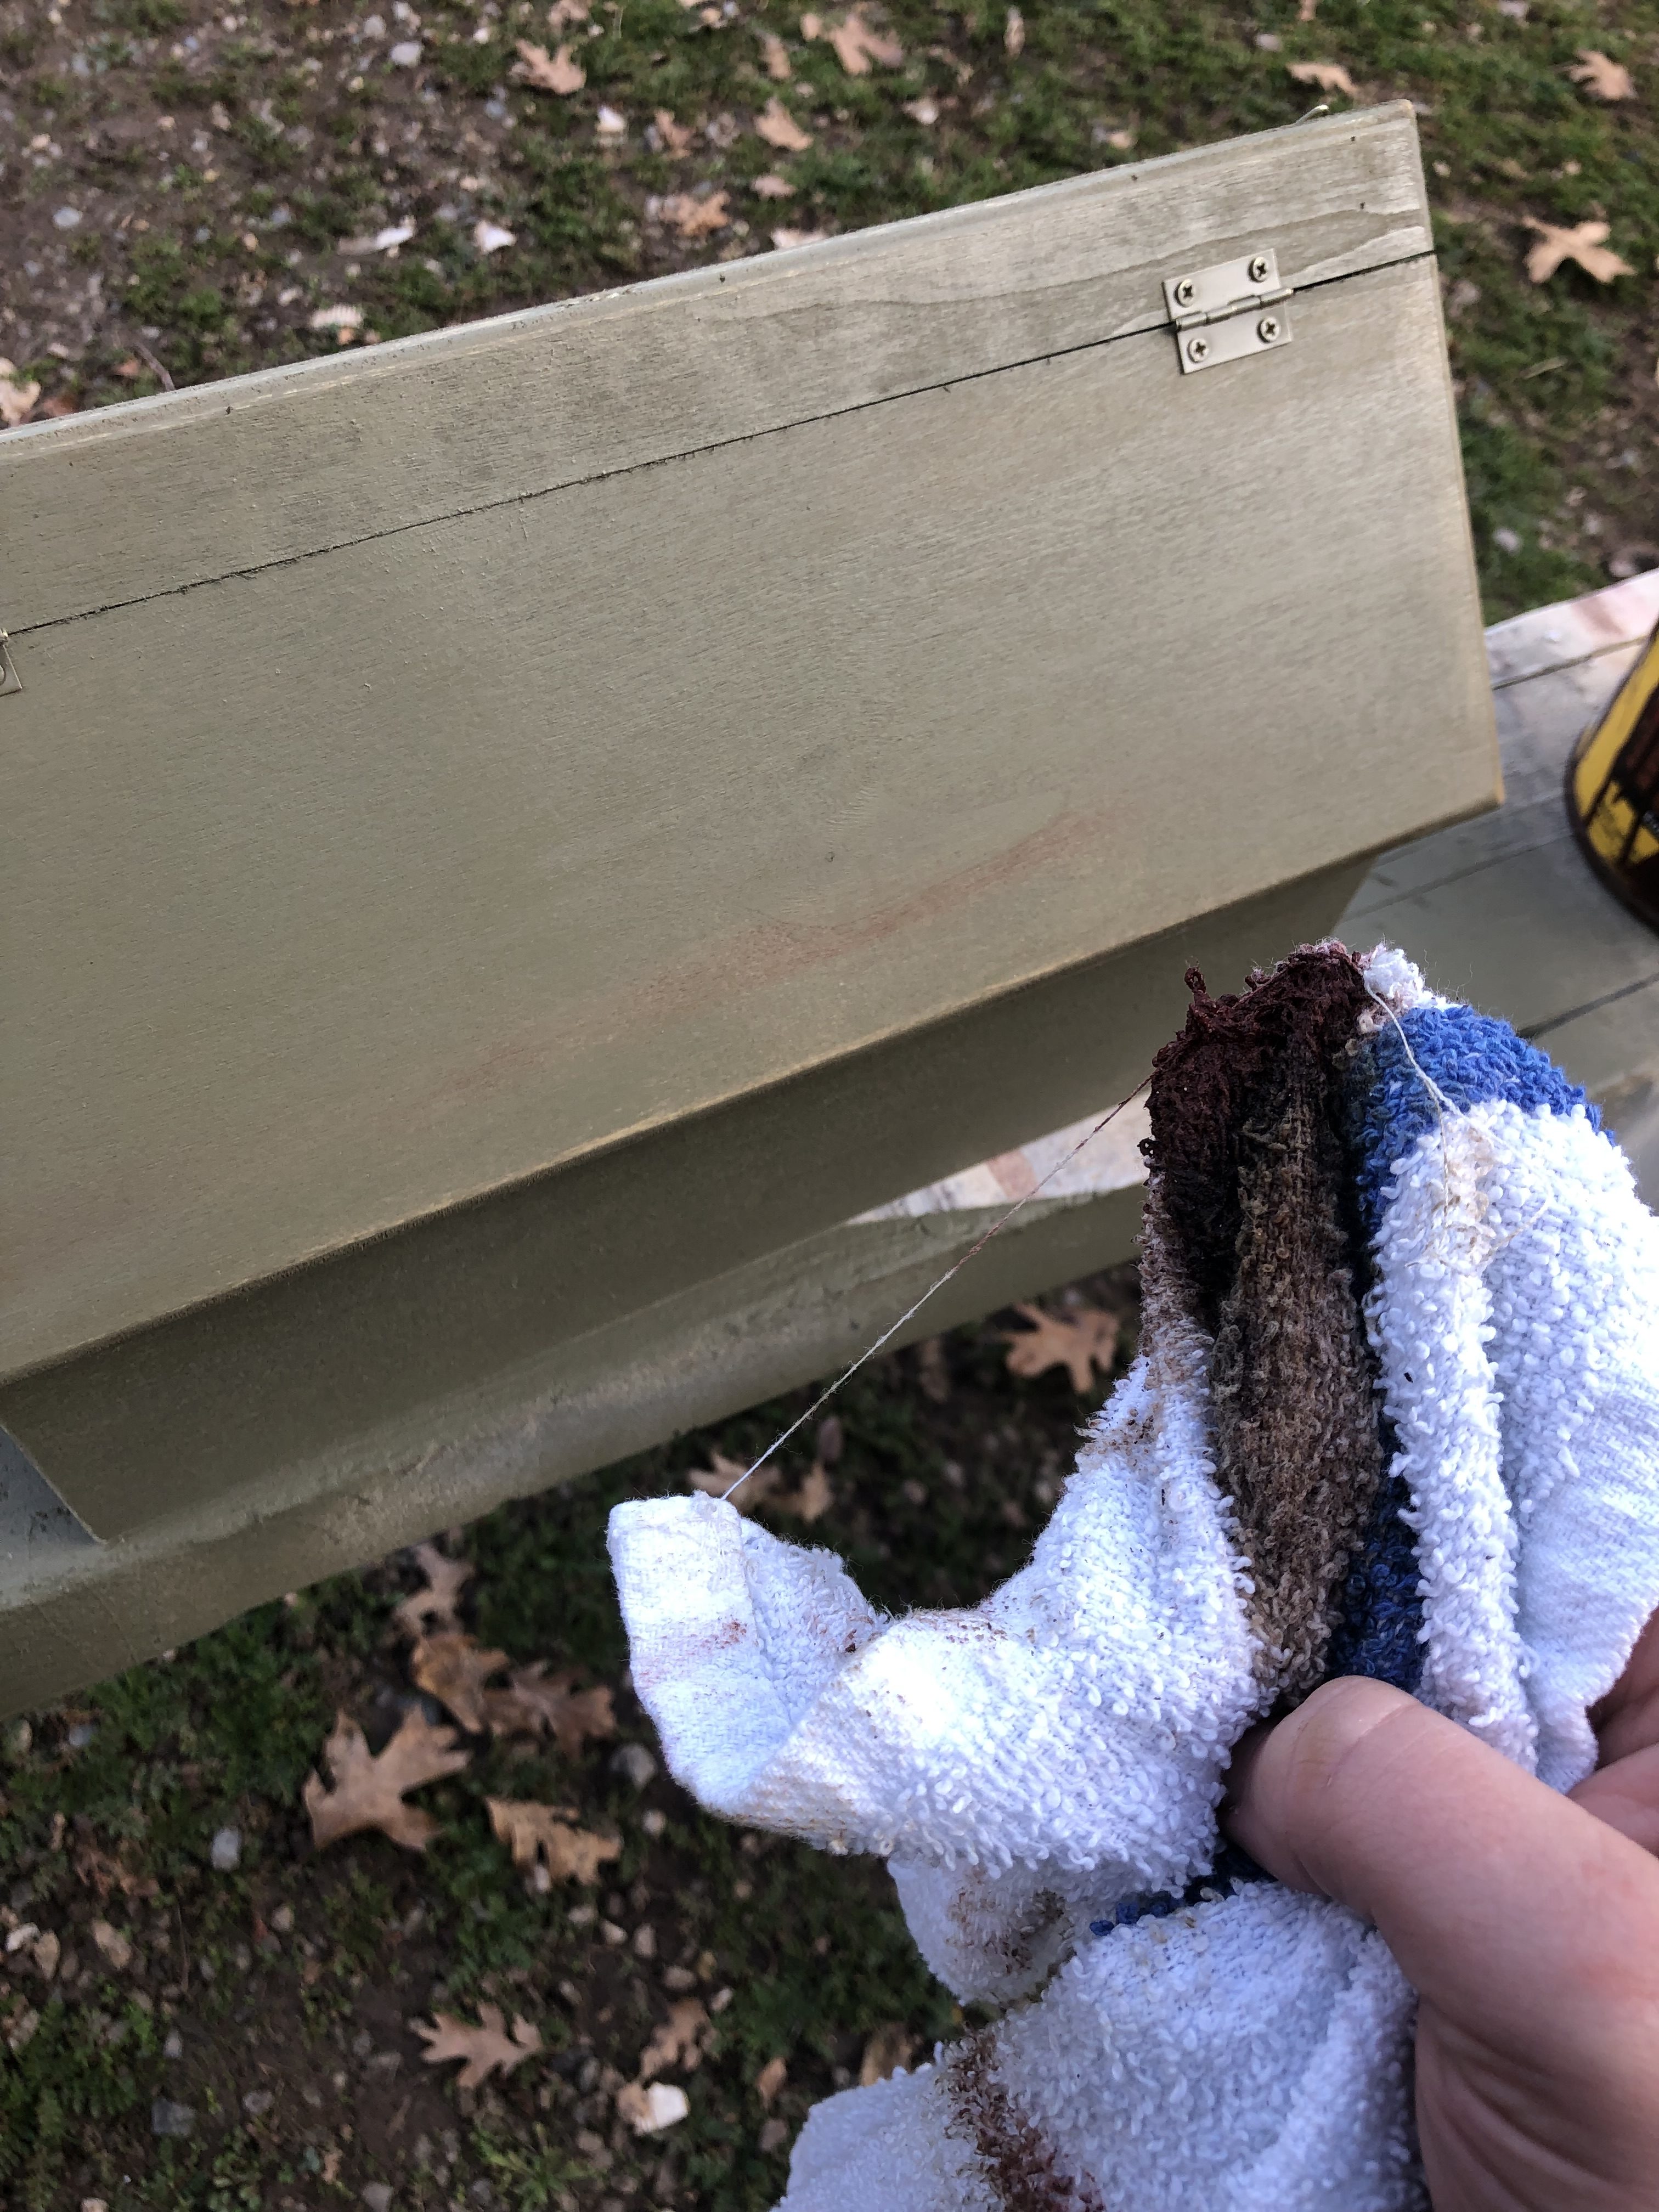
Stain (optional)

Step 1: If you’ve chosen to sand and "roughen up" your mailbox a bit, it’s also very attractive to rub in a bit of wood stain where you’ve sanded. Keep in mind that a little bit of stain goes a long way.

Step 2: Dip your rag into just a bit and wipe over where you want it. Working quickly, wipe a clean part of the cloth over where you’ve stained to wipe off excess. Subtlety is the key here.
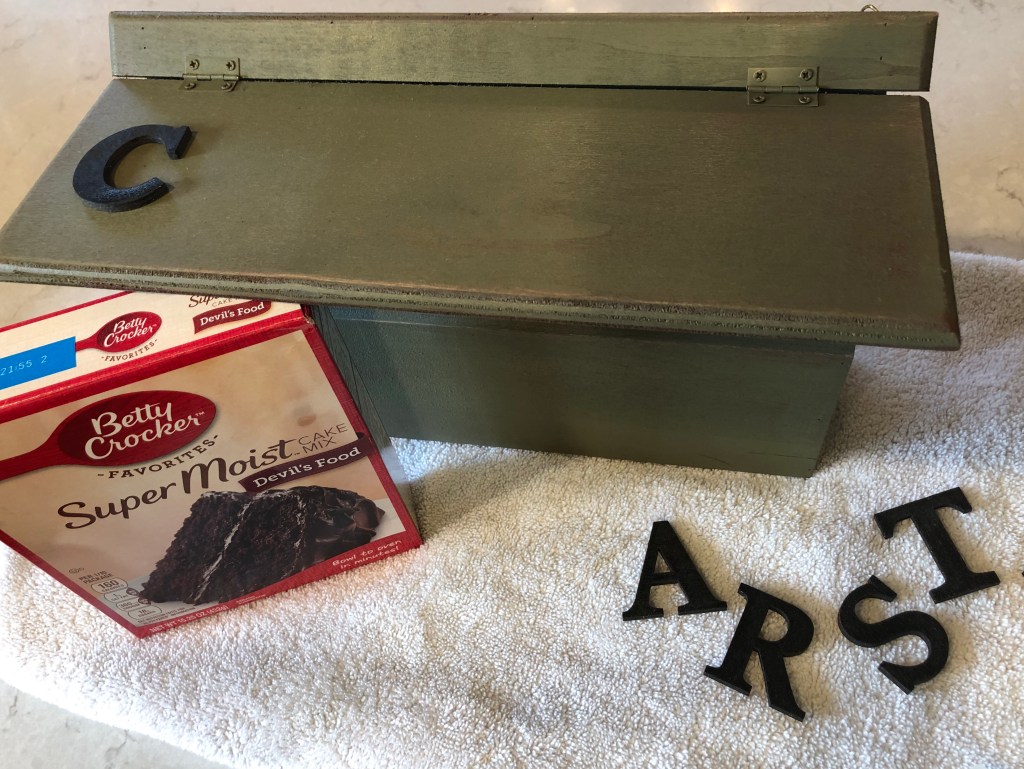
Propping up a mailbox
Lindsay Parrill/NewFolks

Prop it up

Once your paint and stain are completely dry, you can glue on your letters.

Because of the slope of this particular mailbox, you’ll need to find some sort of support for the flap while the glue on your letters dries. We found a boxed cake mix to be superb for this purpose!

Glue

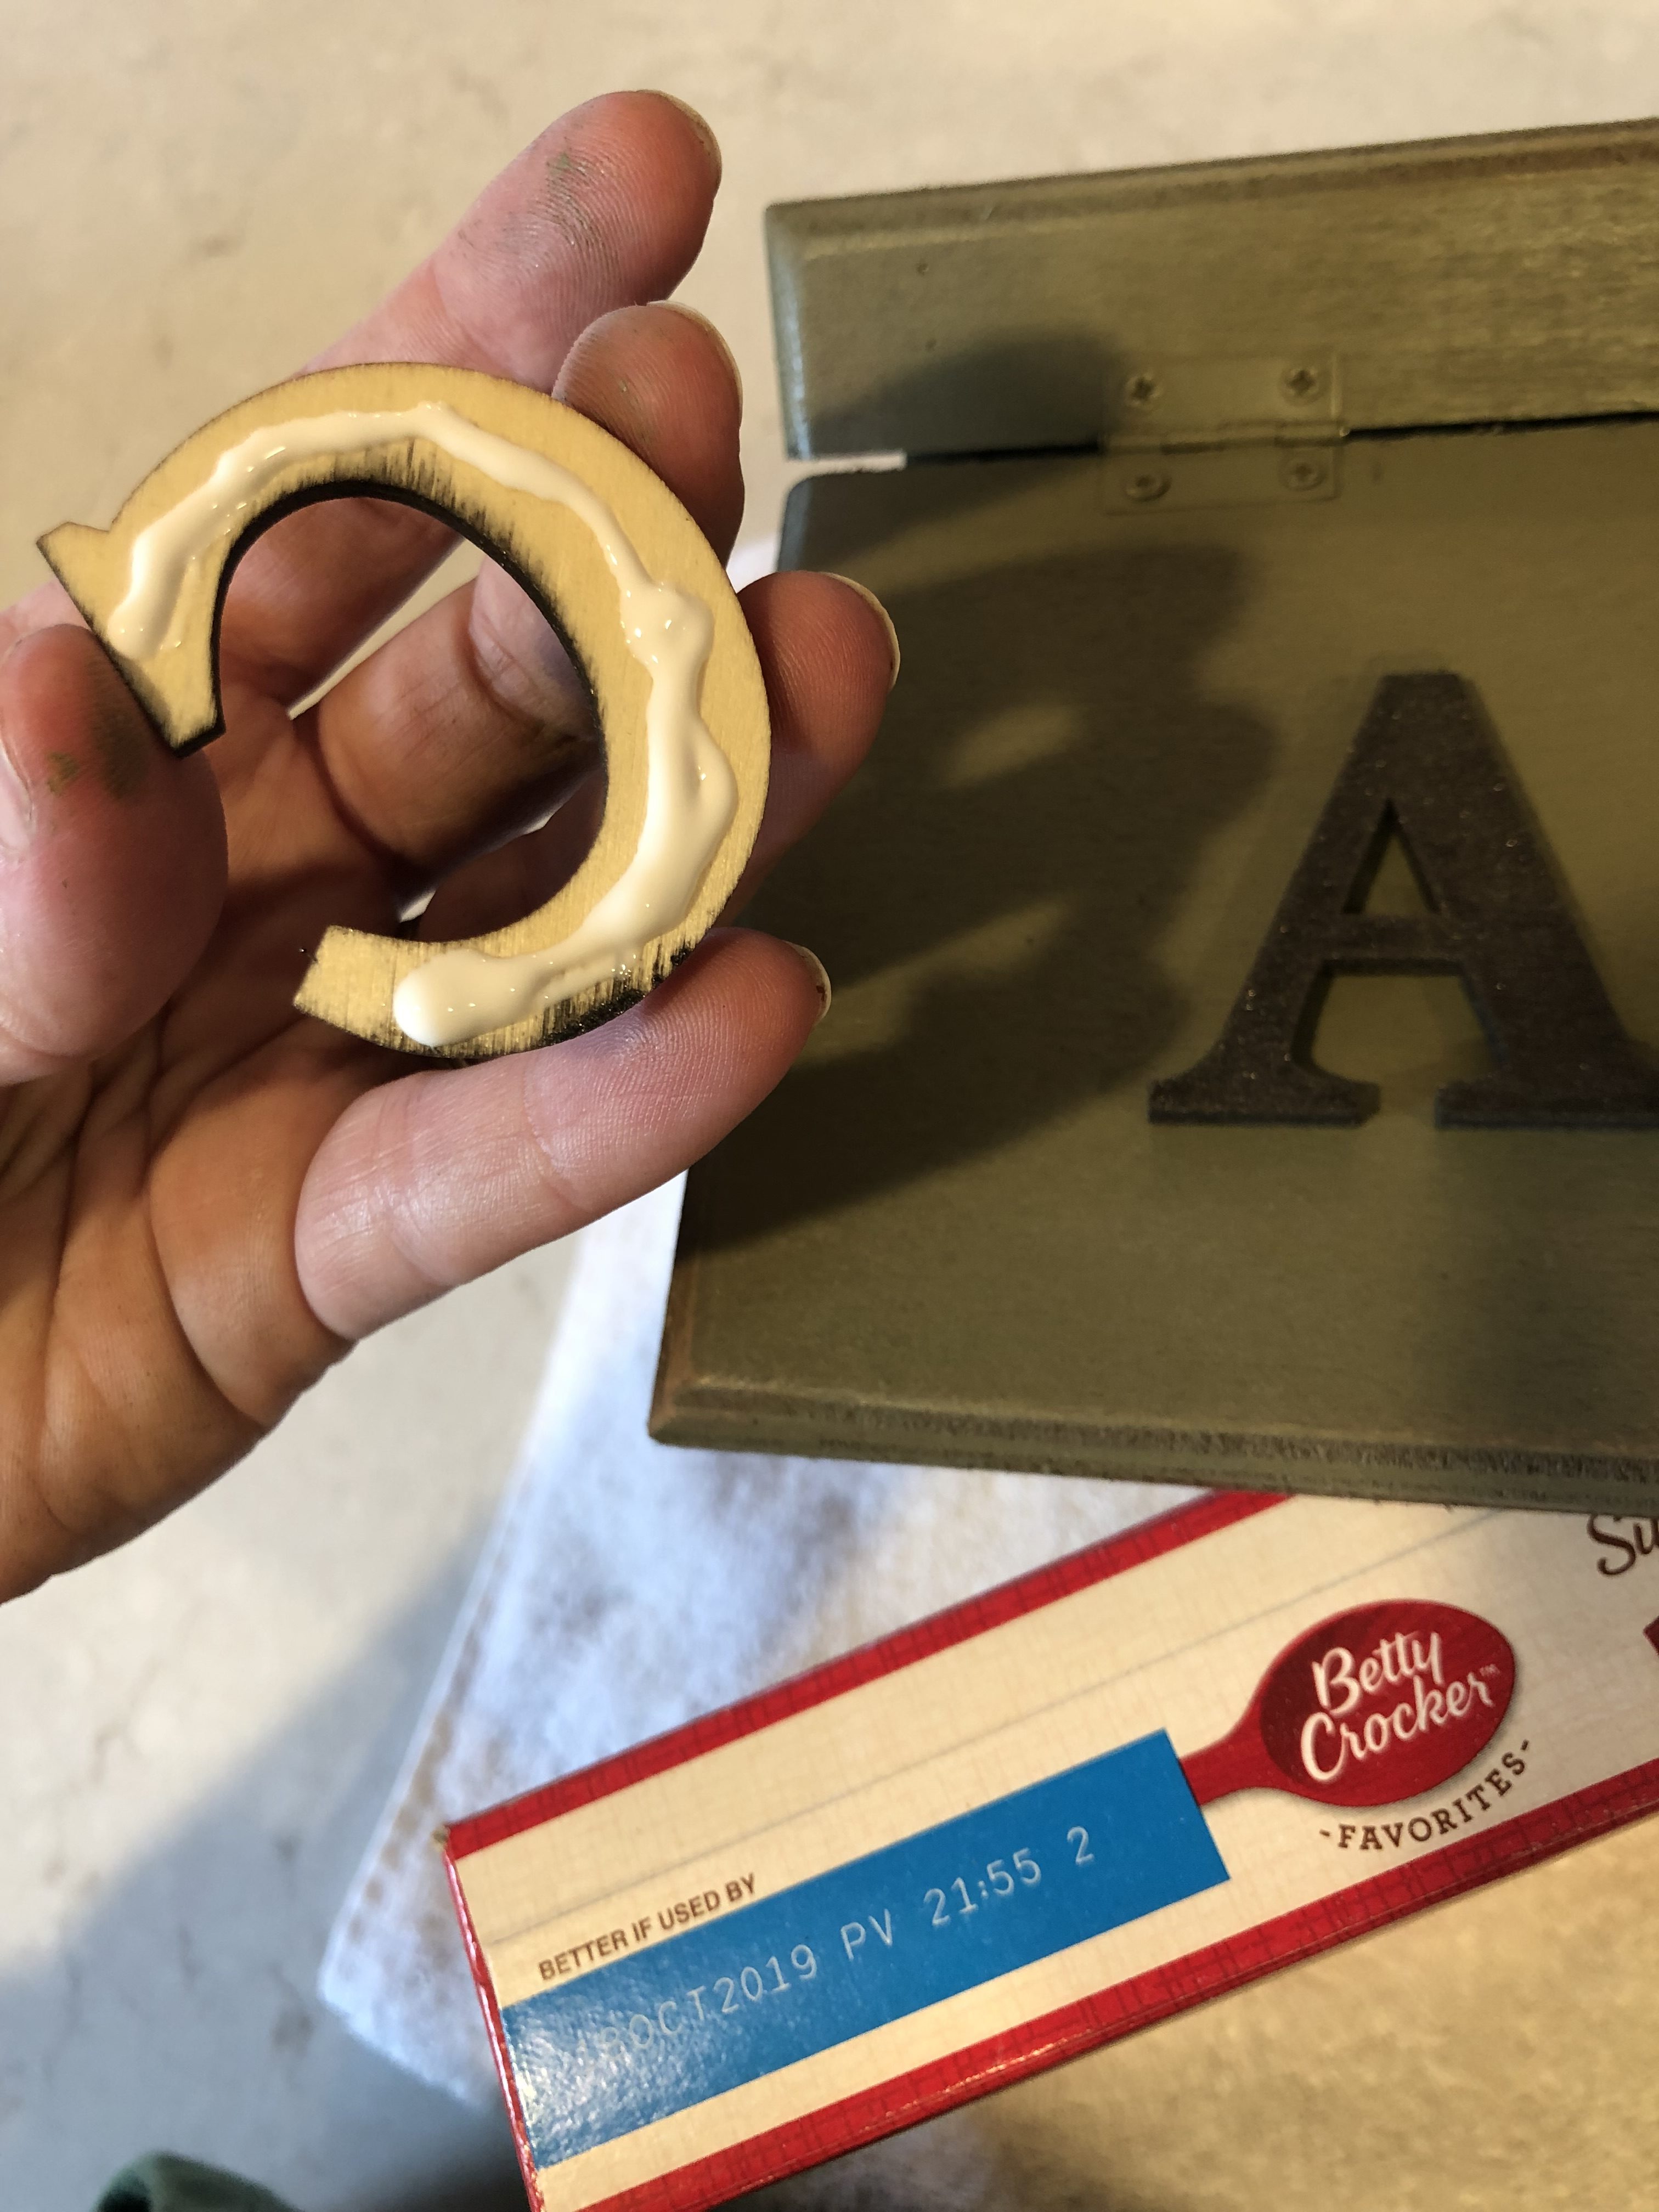
Step 1: Use a glue that dries clear and relatively quickly (but not so quickly that you can’t readjust a crooked letter for a minute or two).

Step 2: Don't use too much or you'll have glue smooshing out from under your letters. If this happens, wipe it away with a damp cloth while the glue is still wet.

Display of finished customized mailbox
Lindsay Parrill/NewFolks

Enjoy!

While the glue dries, make sure the flap of the mailbox remains open (cake box, optional) so your letters don’t slip and slide.

Once everything is dry, it's ready to hang!

These look absolutely beautiful when hung on bedroom doors, but they're equally cute and just as useful when installed on your kids' walls, or even just sitting atop tables or desks.

Editors' Recommendations

Lindsay Parrill
Lindsay is a graduate of California Culinary Academy, Le Cordon Bleu, San Francisco, from where she holds a degree in…
Kid-friendly YouTubers your child will be safe watching
YouTube accounts your kids will love
two kids playing on phones

Kids love to watch videos on YouTube, and since most are watching on handheld devices and not large televisions, it can sometimes be hard for parents to always monitor what they're watching.  And whether you try to limit screen time or not, chances are your kids are watching something without your knowledge.

Most parents have taken steps to introduce children to internet safety, with some installing parental controls while others try to make sure they always know what sites their kids are visiting. YouTube has become hugely popular amongst kids with a seemingly endless variety of new creators who are posting content kids love. It can be overwhelming for parents to try to keep up and make sure their kids are only following kid-friendly YouTubers who aren’t teaching them the wrong things.

Read more
Costume ideas for kids who don’t know what to be for Halloween and are reluctant to dress up
Help your kid get into the spooky spirit with these costume ideas
Boy dressed as a rock star for Halloween

There are lots of kids who obsess about Halloween, planning their costumes months in advance. But there are also some kids who aren't big fans of dressing up, or who simply stress over finding the perfect costume. Whether your little one is scared of the spooky holiday or they just don’t appreciate the itchy costumes, there are plenty of kids who don’t like to dress up on All Hallow's Eve.

If your child finds all the efforts around finding a costume a bit overwhelming, there are Halloween costume ideas for kids that just might help your child get into the spooky spirit. All they need is their own clothes and some minor details added. Here are our top costume ideas for kids of all ages who don’t know what they want to be for Halloween.

Read more
How to make baby headbands that are adorable
Easy DIY headbands for baby
Cute baby girl in a headband sitting up.

Can't resist those darling headbands in the baby department when shopping for your little cutie? What is it about a headband that makes it a must-have addition to baby's wardrobe? Headbands became an accessory in the 20s for ladies. The fashion statement became practical during World War II when women wore them to protect their hair while working in the factories. Sports headbands were big in the 60s, 70s, and 80s to keep sweat out of the eyes of top athletes. By the 80s, though, headbands became a popular trend for everyone on and off the field. Bruce Springsteen made headbands a staple when his Born in the USA album took over the charts. Headbands eventually made their way to children because they're stylish and functional. A headband keeps hair out of the eyes and away from the face while adding style to an ensemble.

Today, babies have started wearing headbands, too. Now, babies don't need a headband to keep hair out of their eyes. They just look super cute in an adorable headband that tops off an equally darling outfit. Headbands are picture-perfect for those delightfully sweet baby photos, and let's not get started on the holiday baby pics. DIY headbands for baby are a fun project to get the creative juices flowing, whether you are a do-it-yourself enthusiast or a beginner. So, how do you make baby headbands? Creating a headband for your baby isn't as difficult as you might think, and we have just the inspiration you need to get started.

Read more