
Crib mobiles are one of the most personal elements of any nursery. They are often a statement piece where everything else is furniture or functional, and they don’t take up any coveted floor space or even wall space. Your baby will love looking up at the dancing elements of whatever unique baby mobile you come up with.
Creating your own personalized crib mobile is an opportunity to make a completely custom piece that is meaningful within your family. You may want to bring in family photos, a design inspired by the meaning of your baby’s name, or even have baby shower guests help create the mobile. Whatever you choose, this simple tutorial will help you think through all the elements that go into creating the perfect mobile for your little one.
1. Get your supplies
This shopping list is pretty simple, but the key is in figuring out what your hanging items will be. They should be lightweight, colorful, and personal. Read through step 3 for more on choosing the mobile’s objects. Get these items:
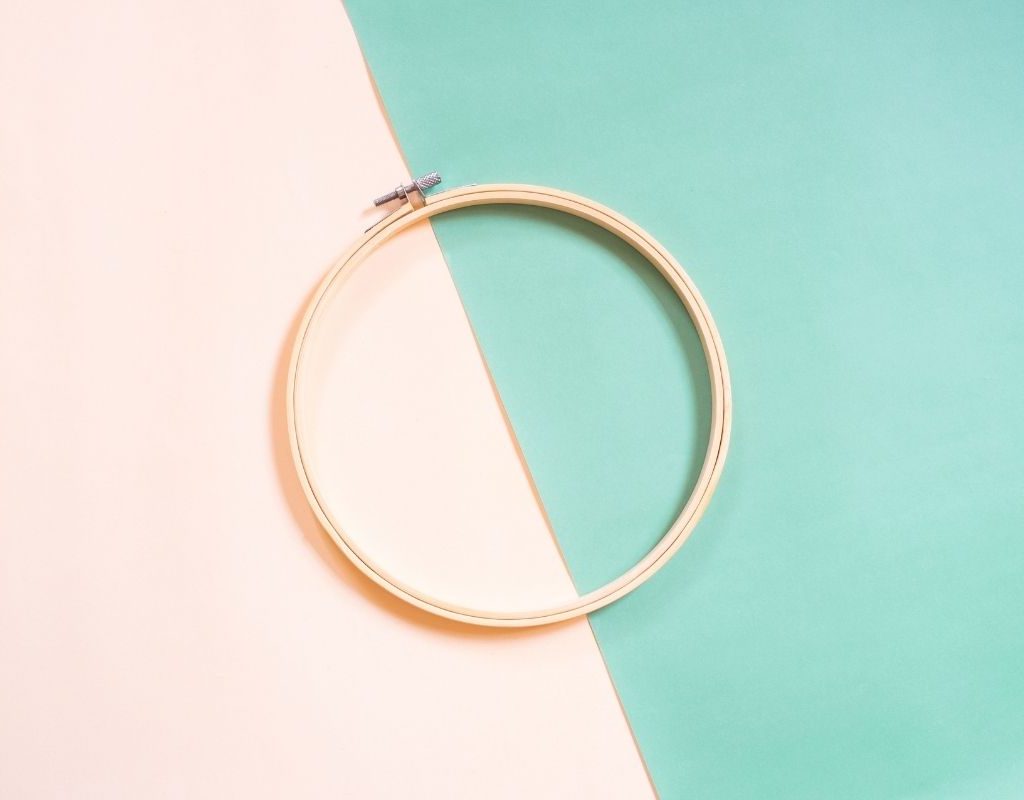
- Embroidery hoop or wreath ring (a 10-inch one should do)
- String, twine, fishing line, beading cord, or ribbon (see step 4)
- Hanging items (see step 3)
- Spray paint, ribbon, or other ways to decorate the embroidery hoop (see step 2)
- Small circle ring (see step 4)
2. Decorate your embroidery hoop
An embroidery hoop (pictured above) is usually made of wood, which means you can hand paint it, spray paint it, wrap a decorative ribbon around it, draw on it, or wrap it in felt to transform it. You could even leave it bare if it fits your theme. Choose a color or pattern that fits in with the nursery decor and hanging items, like black with stars for a planets mobile. You can pick one up at any craft store.
3. Create your hanging items
The items hanging from the embroidery hoop are what will make up the spirit of your unique crib mobile. You’ll want five to 15 items.
You might consider using:
- Polaroids or photo prints cut out into shapes of you and your partner
- Crocheted animals
- Origami cranes
- Planets made out of painted Styrofoam balls
- Faux flowers
- Colorful pom-poms
- Tiny stuffed animals
- Multicolor paper hearts
The possibilities are truly endless. The best part is bringing in the theme of the nursery. You can hang miniatures of dinosaurs, planets, underwater animals, mermaids, stars, or truly anything at all that fits the theme. Make sure they are lightweight and have a way to be secured to a string.
You can punch a hole in a paper or create a loop in something knitted to tie the string around, but you’ll want to think about how the item will be secured to the string before you start making or buying anything. This is the most important part for safety — you definitely don’t want your mobile to rain small objects down on your sleeping baby’s head!
To personalize the items beyond the theme, think about making a station at the baby shower for guests to paint, fold, or otherwise create items for the mobile.
4. String it all together
Now, it’s time to assemble it all together. You can choose any type of string for this as long as it’s sturdy and fits your theme. Clear beading cord or fishing line work well, but if you want a thin colored ribbon that fits in with your decor, go for it.
First, cut four equal pieces of string and tie each one around the embroidery hoop at equally spaced spots apart from each other. Tie the other ends to the small metal or plastic ring to create a conical teepee shape with the hoop at the bottom and the ring at the top. This is the top half of your mobile, and you’ll hang it on a ceiling hook using the ring. The ring can be picked up at a craft store (just search for “round ring” and choose if you want a silver, bronze, white, or another look).
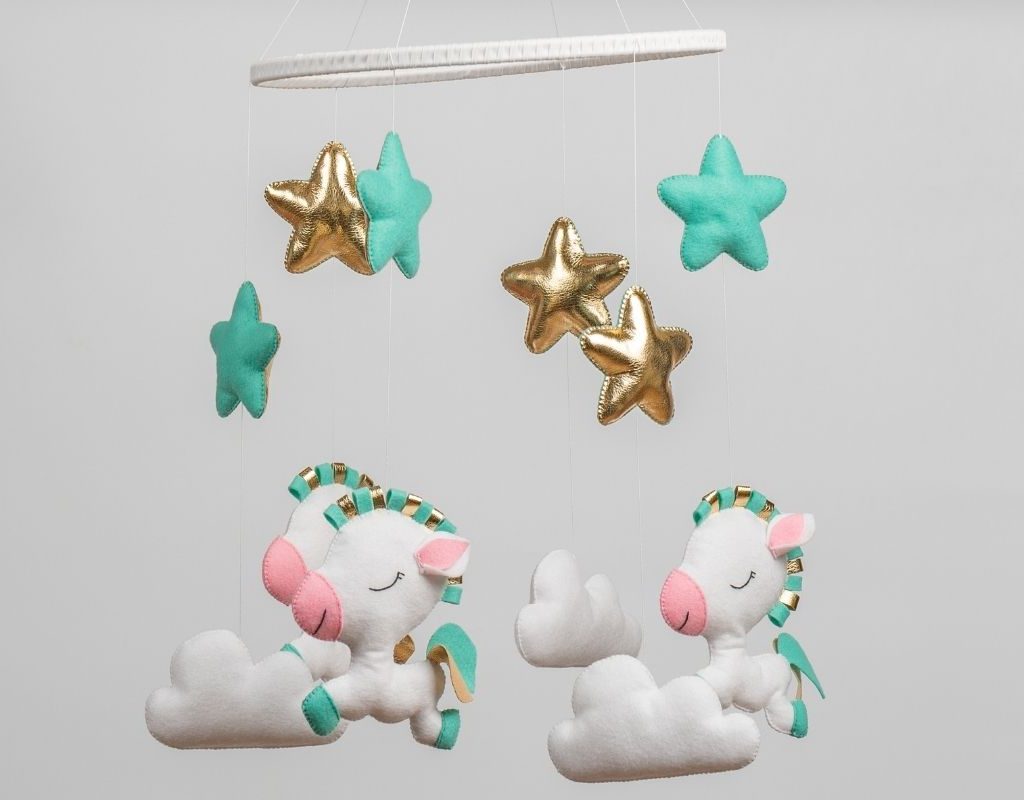
Then, cut additional pieces of string of varying lengths to hang the items from. Tie an item to one end and tie the other end around the embroidery hoop and repeat until all of the items are hanging from the hoop. You can see in the picture above of the unicorn mobile that you can play with varying lengths to make different “layers.”
So, what kind of crib mobile are you dreaming up?