
Remember those childhood afternoons spent hunkered down inside a blanket fort? Your mom and dad would seemingly create a fun blanket fort out of thin air. In reality it was probably whenever it was time to change the sheets or air out the bedding. Either way, blanket forts are always a hit with kids whether it's a snow day or not. Blanket forts make for a hideaway space right inside your own home.
Unlike tree houses and outdoor forts, blanket forts have a straightforward and quick construction that can be broken down just as fast. While blanket forts don’t have the longevity of a backyard tree house, they can be built and put away wherever and whenever kids want one. Blanket forts can also be made by using materials you already have around the house, saving you time and money. Inclement weather and cold days are earmarked for a kid's blanket fort, but it doesn’t have to be raining, snowing, or frigid for kids to want to hunker down inside an indoor fort for an afternoon adventure or a bit of quiet time. The real question is do you know how to build a blanket fort?

How to build a blanket fort in minutes
This type of fort can be made underneath a side table or even the dining room table. For larger tables, you will need multiple sheets. Just make sure anything breakable is put away and the table is empty before you start the steps to building a quick blanket fort.
Step 1: If you don’t have a lot of time, and your child really, really wants a blanket fort, clear off a tabletop.
Step 2: Drape a queen- or king-size sheet over it.
Step 3: Place books on the top. Sturdy books will secure the sheets.
Step 4: Create a cozy floor with a comfy blanket or sleeping bag and toss in some pillows.

How to build a standard blanket fort
So, your children are begging you for an amazing blanket fort to hang out in or want an epic one for a sleepover. Don't worry. A standard blanket fort that needs to last for more than a few hours is not difficult to create. The end result will be an awesome indoor hideaway the kids will want to stay in for hours. If your child will be sharing the blanket fort with guests or siblings, then you'll want to create one that is big enough to accommodate all the occupants as well as their stuff. Of course, a fabulous blanket fort that keeps kids entertained for a long time needs to be roomy. Unlike a quick fort, a standard blanket fort is a bit more involved, but doesn't involve any major construction. Here's how to build a sturdy blanket fort to keep the kids busy.
Step 1: Choose an area where there is a lot of floor space.
Step 2: Place a cozy blanket or sleeping bags on the floor to mark dimensions of the fort.
Step 3: Line up four to six chairs about 4 feet apart along the outer edges of the blanket for walls. The backs of the chairs face inside the fort.
Step 4: Take a large sheet and drape it over the tops of the chairs to create the roof. Pull the sheet tight so it doesn’t sag.
Step 5: Place books on the seat of the chairs on both sides to ensure it stays in place. Add additional sheets for a thicker fort.

How to style up the blanket fort
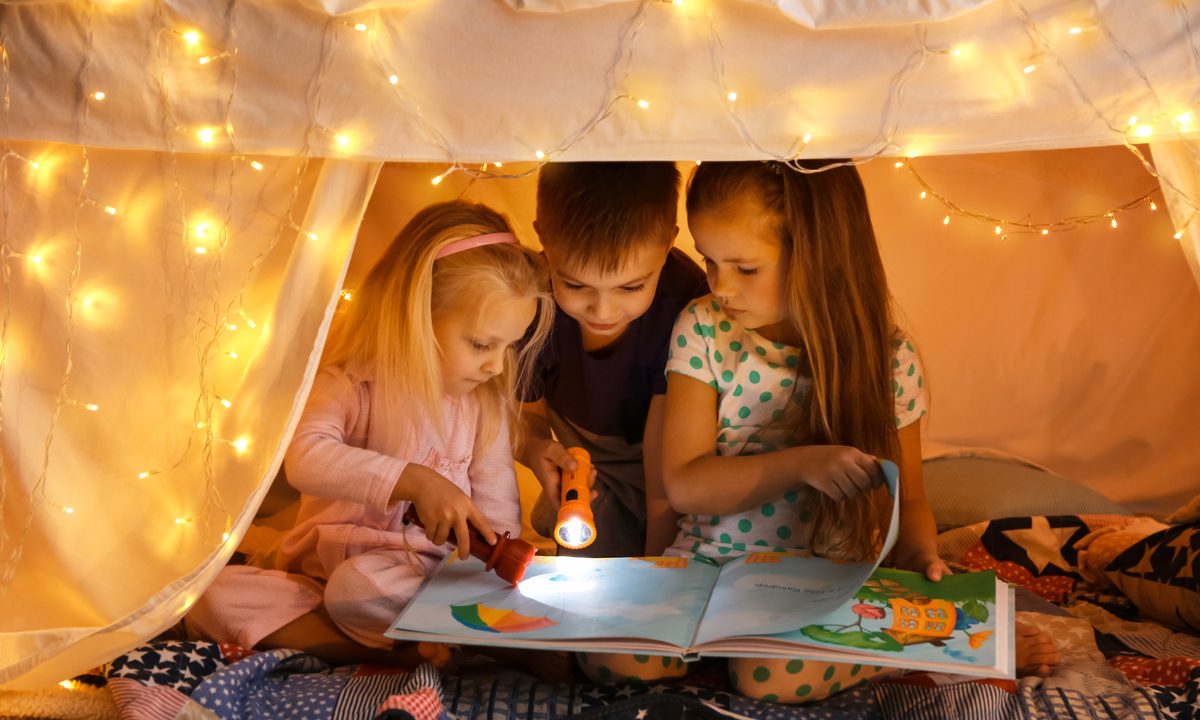
Once the blanket fort is finished, the fun can begin. Add extra throw pillows and blankets to make it super comfy. Forts can get stuffy, so be sure to keep at least one side open for ventilation. You can also position small table fan nearby for added circulation, but if your kids are younger, skip the fan for safety reasons. Another nice touch is to take a set of holiday lights and string them through the chair backs. This creates a soothing atmosphere and gives the kids lighting for reading, coloring, and playing board games. If holiday or LED string lights aren’t an option, flashlights or battery-powered lanterns work, too. Don't forget the "keep out" signs. Those are a mainstay for any kids' indoor fort. The kids can be making those while you're making the blanket fort.
Since, the fort is now ready for occupancy. Kids can bring in the books, dolls, stuffed animals, pets, games, or any other items they want to use inside the fort. Forts are a wonderful place to read, color, play games, or even take a nap. Kids may also want to watch a movie on a streaming device while snuggled up inside their indoor fort.
A snack basket with nonperishable goodies is an addition kids will appreciate because they won’t want to leave the fort to eat. Make up a basket with juice boxes or water bottles, fruit, crackers, or whatever snacks your kiddos enjoy. Be sure to stock the fort with a small pail for garbage, too.
A blanket fort is a wonderful way for kids to ignite their creativity and imagination. Blanket forts aren't difficult or time-consuming to put together. They last much longer than it takes to make. The cleanup probably takes longer than the construction. It’s the memories kids create inside though that make fashioning a blanket fort worth the effort. Now that you know how to build a blanket fort, you will be a huge star especially when your creation rocks the next sleepover.