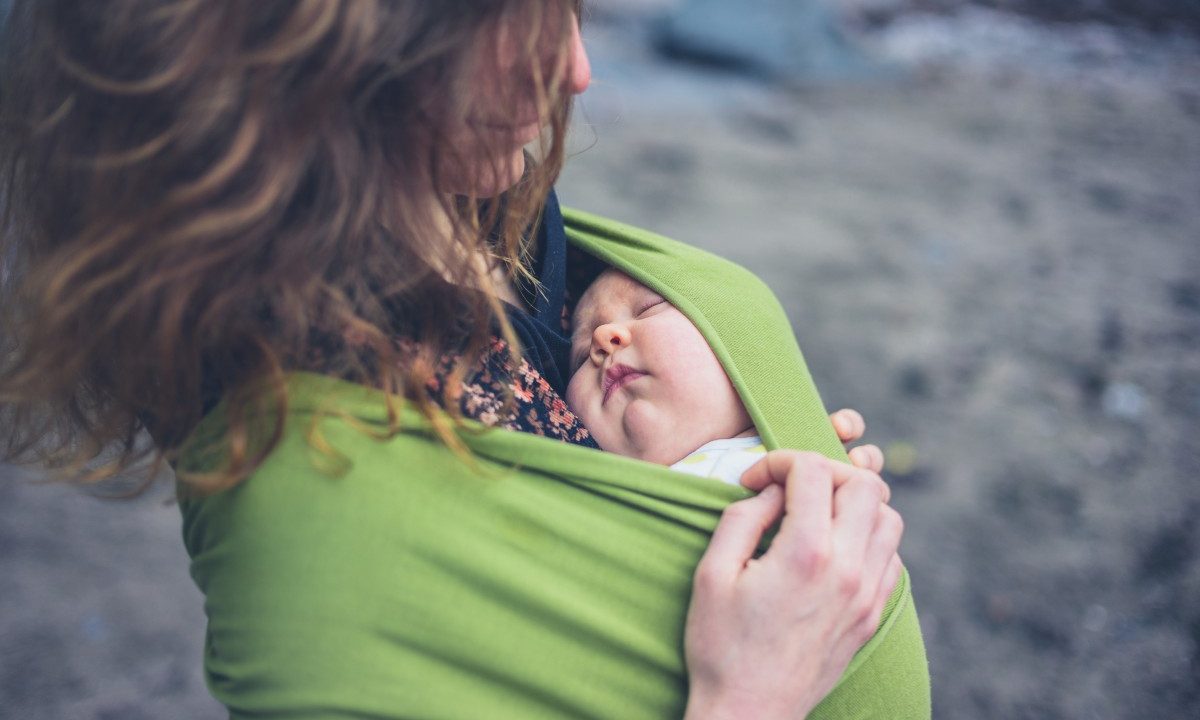
If you’re a new parent or a parent-to-be, you’ve already noticed there are lots of items to buy for your baby. When it comes to comfort for new parents, carrying your new baby around in a sling is beneficial for everyone. But if buying a carrier isn't something you remembered to do or budget for, we'll help with how to make a baby sling out of a blanket so you and your little one remain snuggled up, and your hands remain free.
If your registry and shopping list are starting to seem long, you’ll be happy to know a baby carrier is an item you could make yourself with a sheet or other fabric you may already have sitting around at home. You’ll be amazed to learn how easy it is to make a sling out of a blanket. If you follow these easy steps, you'll make your own customized baby carrier using any blanket, fabric, or cloth of your choosing.

Find the right fabric
You'll customize the look and feel of your baby carrier when you choose your fabric. There are some guidelines you'll want to follow to ensure you have the right size item and material that will work best.
Step 1: Get a piece of cloth roughly 2.25 yards (or about 80 inches) long. Standard-size blankets are 90 inches long, so a regular blanket should work well.
Step 2: Make sure it's a sturdy material that feels comfortable against your skin and won’t irritate baby’s sensitive skin. We recommend using a woven fabric that's breathable and easy to wash.
Step 3: Choose a pattern you like and that matches a variety of colors and designs, so it looks good no matter what you or your partner wear.
Step 4: Blankets are the most common go-to items to turn into baby carriers. However, you could also use a tablecloth or a large scarf. Just make sure it is enough fabric based on the necessary length of 80 inches.

Use your fabric to make the carrier
Now that you've chosen your fabric, it's time to make your baby carrier.
Step 1: Spread the fabric across your back.
Take both ends of the fabric and spread them diagonally across your back. Make sure the fabric is flat. You don’t want twisting or unevenness back there.
Step 2: Pick a side.
Choose the shoulder that feels more comfortable and natural for carrying the baby. This method works on both sides, so it doesn’t matter if you are a righty or a lefty.
Step 3: Pinch away.
Take the fabric that sits on your shoulder and pinch it, gathering both sides, trying to make your pinching as even as possible. This will help you spread the fabric once the baby is being carried, so you'll fit them nicely and snugly against your chest.
Step 4: Repeat on the other side.
Now take the fabric that is still hanging and pinch as you did with the other end. Again, try to make this pinching even. By the end of this step, you should have gathered both ends of your fabric and are now ready to tie the knot.
Step 5: Make sure the fabric across your back is still flat. It won’t be as wide as it was before, but there still shouldn’t be twisting or unevenness.

How to tie a slip knot
If you don’t know how to tie a slip knot, don’t sweat it. Not all of us were Scouts. Here’s how to do it in a few simple steps that are easy enough to try.
Step 1: Take the bottom end of the fabric across your chest. This is now your horizontal end.
Step 2: Place the horizontal end across the vertical end of the fabric.
Step 3: Cross the horizontal piece behind and up through the top.
Step 4: Drop the horizontal end of the fabric down.
Step 5: Take it underneath and over the vertical end.
Step 6: Pull the fabric through the loop to make the knot.
Step 7: Adjust to your preferred height.
The beauty of the slip knot is you could adjust it to your own preference and height. It slides easily up and down without untying it This is convenient because once you’ve made the knot you shouldn’t have to redo it often. Just slip it off and readjust it to the height of the person who is wearing it.
Step 8: Customize to the size of your baby.
Adjust the fabric to fit your baby’s size and your comfort level. The sling should create a little nook for them to be cozy, without it being too tight or too loose. Readjust once you have the baby positioned in the sling the way you want to make sure you are both comfortable.

Try it out
The only thing left to do now is to try out your new baby carrier! Enjoy creating a safe and cozy spot for your child to hang out in while you keep your arms free for other activities.
Step 1: To put the baby in the sling, hold them up high on your shoulder and slide their feet and body through the sling.
Step 2: Tuck the bottom of the fabric underneath to position it between you and the baby.
Step 3: Open the baby’s legs so they are hooked onto your upper body. Make sure the fabric goes from one of the baby’s knees to the other. Double-check to make sure the baby’s neck is supported at all times, and when you start to move around.
Step 4: Make sure the baby is positioned properly and centered within the pouch. If one part of your arm or shoulder seems to be taking the brunt of the baby's weight, spread the material on your shoulder out. This will even out the weight more evenly across your whole shoulder.
Step 5: Make all the adjustments you need to fit the baby snugly, so it feels safe for you and your little one.

Experiment with fabrics and ways to tie the sling
Not all homemade slings are created equal. Make sure you test drive various one at home before taking them out shopping or to another function to make sure your baby enjoys the one you made, and your body doesn't mind it.
Step 1: Try other fabrics.
There are fabrics to try and ones to stay away from. Avoid anything stretchy, as baby will weigh it down and you'll only end up holding baby the normal way.
You want thicker fabrics that are more durable like twill or linen. But also try different ones to find one your shoulder likes and keeps baby happy.
Step 2: Add rings if you need to.
Those sling rings could make the process easier if you are having difficulty or can't get the knots right.
Step 3: You can use the blanket in a variety of ways.
One you get the hang of it, you can use the blanket, sheet, or scarf as a wrap, sling, or carrier. If you have a sore shoulder, your back is starting to hurt, or your baby is outgrowing their love for a certain style, you could switch it up with another way to wear them.
There are many benefits to making your own baby carrier out of fabric. There is no sewing required with this DIY project, which is always a plus, but it's also easy and affordable. It allows you to choose the fabric of your preference to make as many as you like to match with your outfits and the baby’s wardrobe.
You could also adjust the sling for you to share with your partner, so everyone takes turns carrying baby. It works on both sides of the body and you can reuse it as often as you like until the fabric starts to wear. Plus, you'll love using a homemade item that creates a greater bond between you and your baby.