
How to draw an Easter bunny (even if you have no artistic ability)

Any time a holiday comes up, parents everywhere have to come up with a craft with the theme for that holiday. We learn how to draw Christmas trees and the most perfect hearts for Valentine’s Day. If the thought of having to draw an animal makes you sweat a little bit with Easter coming up, let us be of assistance. It’s going to be all Easter bunnies all month long. With a little help, your bunnies will look more Easter fun and less Halloween scary.

Two children drawing an Easter bunny.
Image used with permission by copyright holder

How do you draw an easy Easter Bunny?

We know not everyone is an exceptional artist. But guess what? Kids just want it to look remotely like it’s supposed to, and they will think it’s great. Don’t worry too much about perfection. If you make one ear larger than the other, turn it into a floppy ear. If one little paw doesn’t come out right, draw a carrot over it. Kids only care that you are spending time with them and doing something together.

Knowing how to draw an Easter bunny can be broken down by using circles and ovals. Lots of arched lines make drawing a quick bunny easy for parents and kids. Think more cursive flowing lines and less harsh print straight lines. If you have older kids and they say anything about your skills, make sure you have them draw one and see whose bunny looks more like a bunny. Or have everyone in the family try their best to draw this how-to and see whose comes out looking the most like it.

How do you draw an easy bunny step by step?

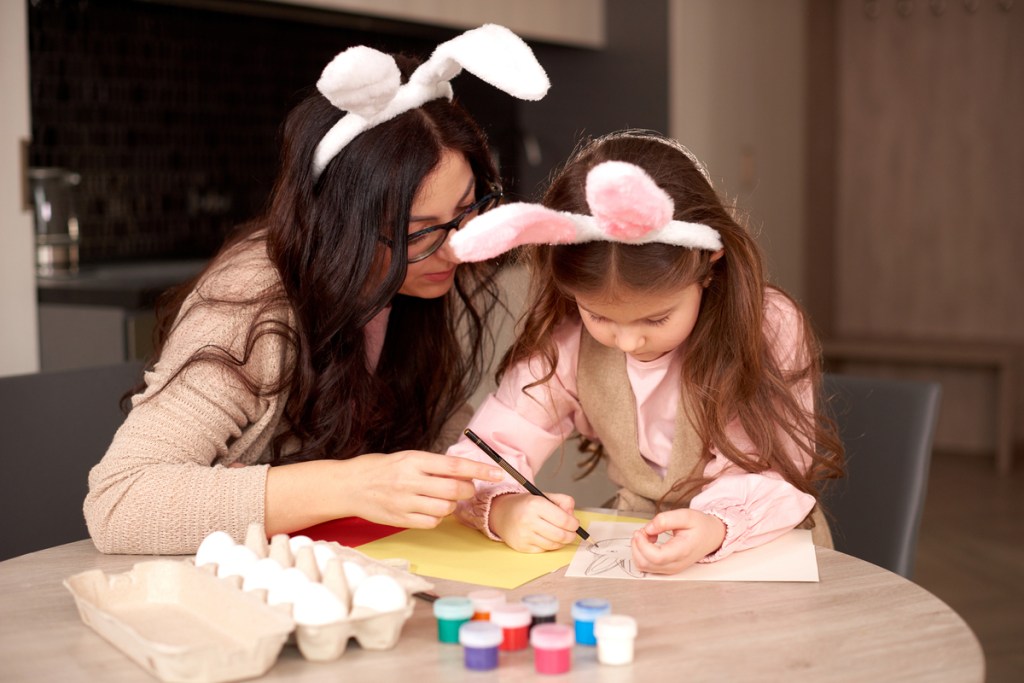
For this super easy bunny, it doesn’t matter which way you have your paper, or even what color paper you use. If you plan on coloring it or having your kids color it, you will want to find white paper though.

The steps

For the head

  • Draw a circular shape for the head: it doesn’t have to be an exact circle so don’t worry.
  • Then draw smaller circles or ovals for the eyes: these are going to be filled in, like bigger dots.
  • For the nose, draw your cutest heart.
  • Draw a regular “J” and a backward one coming out of the bottom point of the heart.
  • For whiskers just add three slightly curved lines coming out of each of the cheeks.
  • One ear will be straight up by drawing two longer arches connecting at the top.
  • The other ear has to be floppy so make one longer, more curved arch that ends in a point.
  • Then make another arch from that point but only meet the first arch halfway.
  • Connect that arch from that point to the head.

For the body

  • Draw two curved lines next to each other that start and end on the edge of the paper.
  • You can add some toes by drawing two short, horizontal lines on the inside of the outer edges.
  • Connect the head to the feet by drawing curved lines.
  • The wider or more apart the lines are, the fluffier the bunny will look.
  • Draw two more curved lines, starting from the head just apart from the body lines to about halfway down the body for the arms.
  • Add a little tail by drawing a cloud-like shape on either side of the bunny from the bottom of the body to the side of the foot.

How do you draw a realistic Easter Bunny?

If you want to draw a more realistic bunny, but don’t think you can get beyond the cartoon-style version, we have you covered. We found the easiest, fastest (under two minutes) YouTube video that takes you from two basic circular shapes to an adorable and realistic shaggy bunny.

We had to watch it twice just to believe that it could be that simple. While the last step did seem to jump a bit for us, our bunny actually looked like a bunny. The trick to make a realistic bunny is to draw the fur with frequent shorter lines for the outline instead of solid lines.

If you really want to amaze the kids and show you are the bunny drawing boss, there is a great YouTube video that’s fifteen minutes long and the results are stunning. Maybe practice a few times before you show off to the kids.

A mother and daughter doing an Easter craft.
Image used with permission by copyright holder

How do you draw an Easter bunny out of an egg?

Drawing a cute little bunny popping out of an Easter egg is a classic favorite. And it is easier to draw than you’d think. All you need to do is draw the cracked egg and then you can take the step-by-step instructions of how to draw an easy Easter bunny and stop after you have the head done.

To draw the cracked egg

  • Draw a half oval on the bottom of the page with the open end facing the top of the page: basically, draw a giant “U”.
  • Connect the open ends with a “W” pattern.
  • Draw the bunny face coming out of the egg.
  • Decorate the egg with any pattern you like.

See? We told you it wouldn’t be that bad. If you want to try your hand at a bit more detail, there is a YouTube video that isn’t too hard to follow.

With our easy-to-follow steps, you and your children can draw as many cotton-tailed buddies as you’d like. Sure, printouts are easy, but having a contest to see who drew the silliest, craziest, or most realistic Easter bunny in the family is way more entertaining. And sometimes, it’s even better if they turn out just a little bit terrible.

Editors' Recommendations

Dannielle Beardsley
Dannielle has written for various websites, online magazines, and blogs. She loves everything celebrity and her favorite…
How to make a DIY LEGO table at home in just one day
budget lego table lego2

If you're a parent currently raising a child who holds a deep love and appreciation for those buildable cubes, aka LEGO blocks, then we have the perfect weekend DIY project. What makes this project even more special is it’s ideal for completing with assistance from your own little helper. With some supervision, a few power tools, and a little ingenuity, you and your kid will have a budget-friendly DIY project that they can enjoy for years to come. 
How to make a LEGO table
We’ve scoured the internet, researched the elements, and found the most bang-for-your-buck products that will have your child building castles, cannons, or craters in the matter of one day. Forget the expensive toy versions and toss out those hard-to-follow instructions or videos that cost too much or take too long to complete. This version is perfect for those casual weekend builders and their little helpers looking to make lasting memories and a fun project together. 

Plan your project
In order to put together the most budget-friendly and easy-to-make project possible, it’s highly recommended that parents plan this one in advance. To complete this DIY LEGO table in one day, some recognizance, research, and planning are needed prior to construction.
1. Find the table that will serve as the base of this project
Utilizing leftover furniture pieces in or around the home, the local thrift store, or social media marketplace are always good first choices. If a newly purchased base is necessary, we recommend an easy to assemble and cheap possibility from a local store. For around $15, it's possible for parents to put a table together in minutes.
2. Pick up some LEGO bases
We recommend parents grab these peel-and-stick, glue-back LEGO bases. They come in 10-by-10 inch blocks that come together flush, making the design as seamless as possible. Most table bases require only four pieces from the pack of six, allowing parents with leftover pieces should one arrive, or become, damaged.

Read more
How to tie-dye shirts without a mess
colorful tie-dye shirts hanging on a line

Does tie-dye bring up images of a Grateful Dead concert? Well, you're not alone. Tie-dye took off in the United States in the late 1960s and early 70s, but the truth is, those cool swirls of colors on clothing and other materials have been around for quite a while, and not just at Woodstock. Tie-dye is thought to have been a thing in other cultures for thousands of years with certain patterns identifying different regions. The earliest examples of tie-dye come from South America. Since the 60s tie-dye has been a mainstay in the US and a popular one with kids and teens. Tie-dye shirts for kids are actually a fun DIY project and not as messy as you think. Keep these tips in mind and you can make the whole family a tie-dye ensemble without making a huge mess.
How to tie-dye shirts without a mess
The first step to a stress-free tie-dye experience is getting a one-step tie-dye kit. Kits include a range of non-toxic dye colors already mixed and in easy-to-use squeeze bottles. All you have to do is add water to the pre-mixed colors, and the bottles are ready to go. You can, of course, mix up your own dye colors in squeeze bottles, but the ready-made ones save a messy step.

Inside or outside
Tie-dying on the patio or deck is ideal, but you can also do a tie-dye project inside, too. Cover any table with a throw-away plastic tablecloth. Lay out puppy pads for the kids to work on. Puppy pads are key because the pads absorb any excess dye and help make the cleanup super quick.
Cover up
Whenever you're doing a painting or tie-dye project, old clothes are in order. If you don't have aprons as an extra coverup, large trash bags work great. Just cut neck and armholes for each tie-dyer and throw them out when you're finished. Rubber gloves are a must for the parent or caregiver rinsing the clothing once it's been tie-dyed. Kids can also wear rubber gloves when applying the dye to the clothing using squeeze bottles.
Store in individual sealed plastic bags
Once each shirt is completed, place it inside a Ziploc bag. The dye must sit for 12 to 24 hours before being rinsed. Label each bag with the maker's name. Only store one item in each sealed plastic bag.
Other tips for a successful tie-dye
Keep these additional tips in mind to help make your tie-dye project a smashing success.

Read more
The best balance bikes for toddlers you can have delivered today
A toddler boy riding a bike.

When your little one is old enough to start riding a bike is such an excited (and scary) time as a parent. Picking out their first bike is so much fun. But to help teach your precious babe how to grasp riding a bike, you need to start with a balance bike.

For kids around the age of 2, balance bikes are a great new toy to introduce to them. They don’t have pedals, so you don’t have to worry about that yet. It’s the perfect way to teach your kids bike basics before graduating to a big kid bike. Enough chatting. Let’s check out the best balance bikes for toddlers that you can get right now.

Read more